Downloading R
To use R, we first need to have it installed. Doing that is fairly simple. Just go to this website and follow the instructions! Once you have the language itself installed, you should also download RStudio, which is commonly referred to as an IDE (integrated development environment). That can be done here.
Pick the free version.
RStudio
RStudio provides the luxury of keeping track of variables/data/packages and provides a lot moe flexibility in general, which you will quickly see. So, no one needs RStudio to work in R but it is helpful.
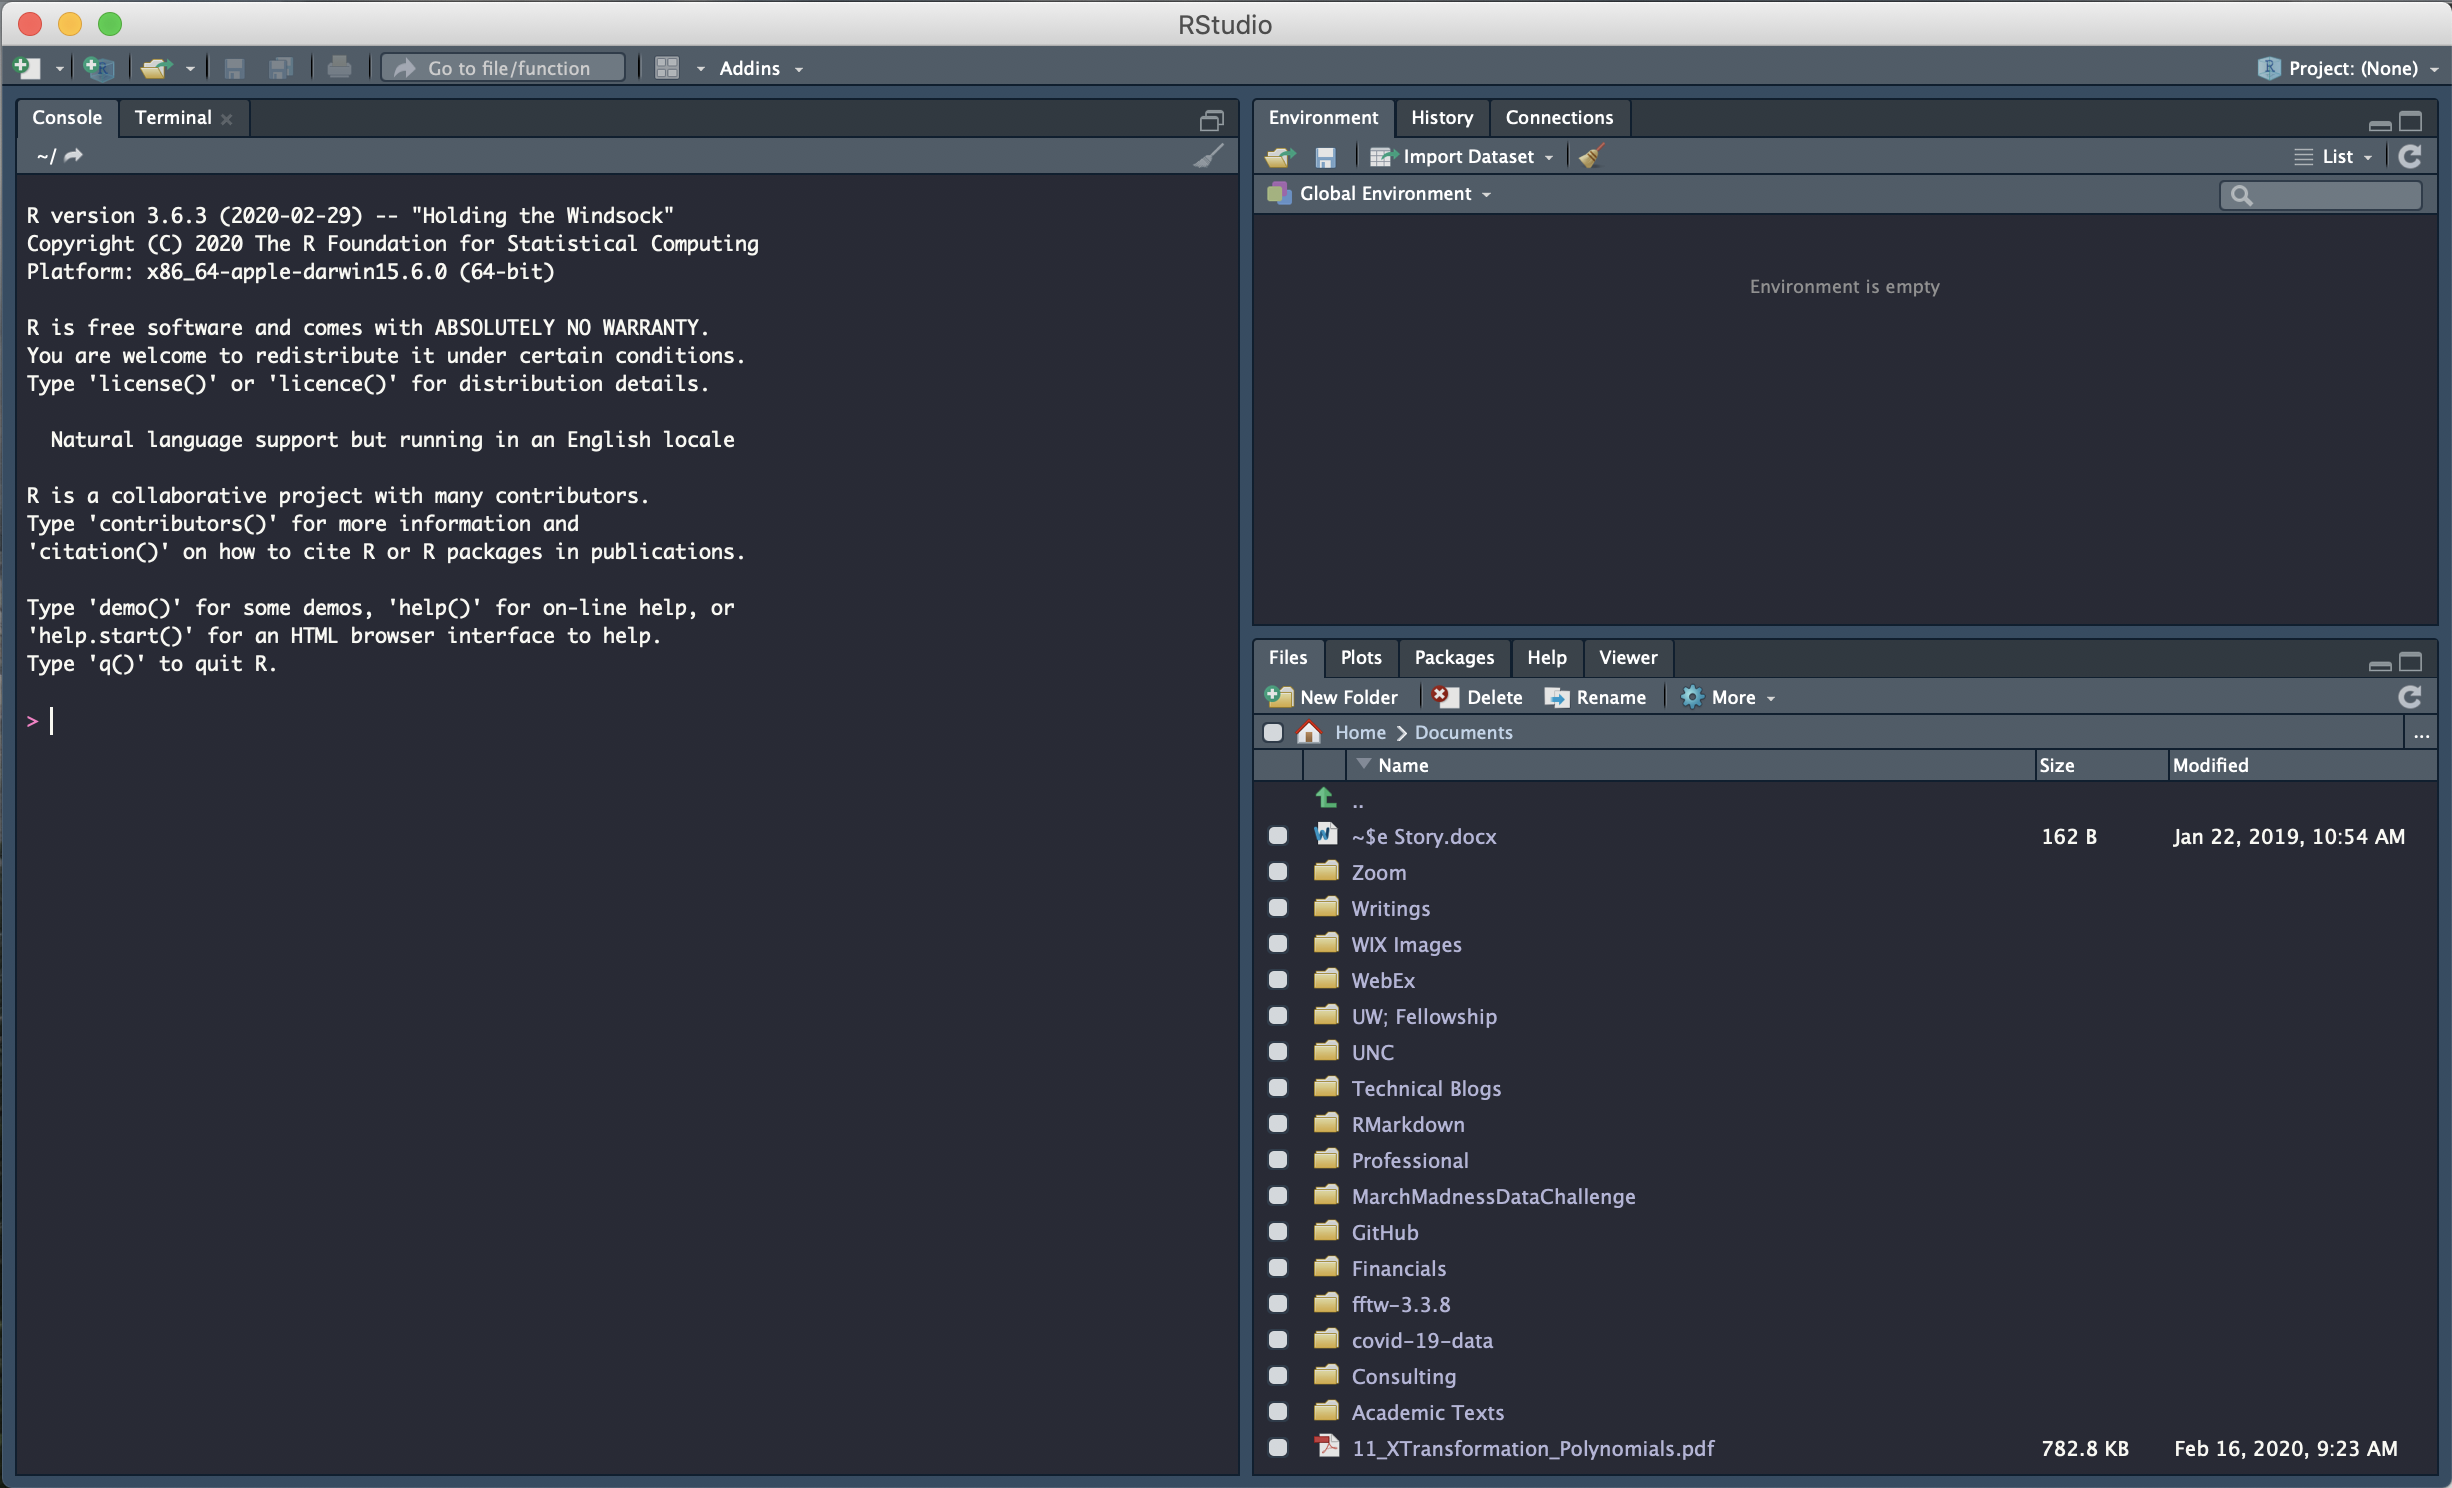
Now, open RStudio. There should be two columns, with the right column having two windows. Notice that the left column has two tabs - "Console" and "Terminal", with the default toggled to console. If you open R itself (not RStudio), you'd notice that the console pane is a mirror image of the R shell. So, RStudio provides all the other panes, which we will cover here.

Initial RStudio Setup
The upper right pane, by default, will be set to environment. Here, we will be able to see all the data loaded, variables saved, etc. This is nice because instead of printing these things to our console, we can just peak over to the right and find information about our environment there. History is exactly what it sounds like. The connection panel is helpful to connect to servers to work with data stored elsewhere, remotely. By default, those are the only three. But, we can discuss some other common panels that may come up as you become more advanced R users!
The bottom right panel has four tabs, files, plots, packages, help, Viewer. Toggle through these - they should all seem fairly explanatory. If not, we will cover them in class. I will say that the help panel is a lifesaver as you're starting out. Try typing ?sum into your console - now check out the help panel. Anytime you're unfamiliar with a function, we can find it there.
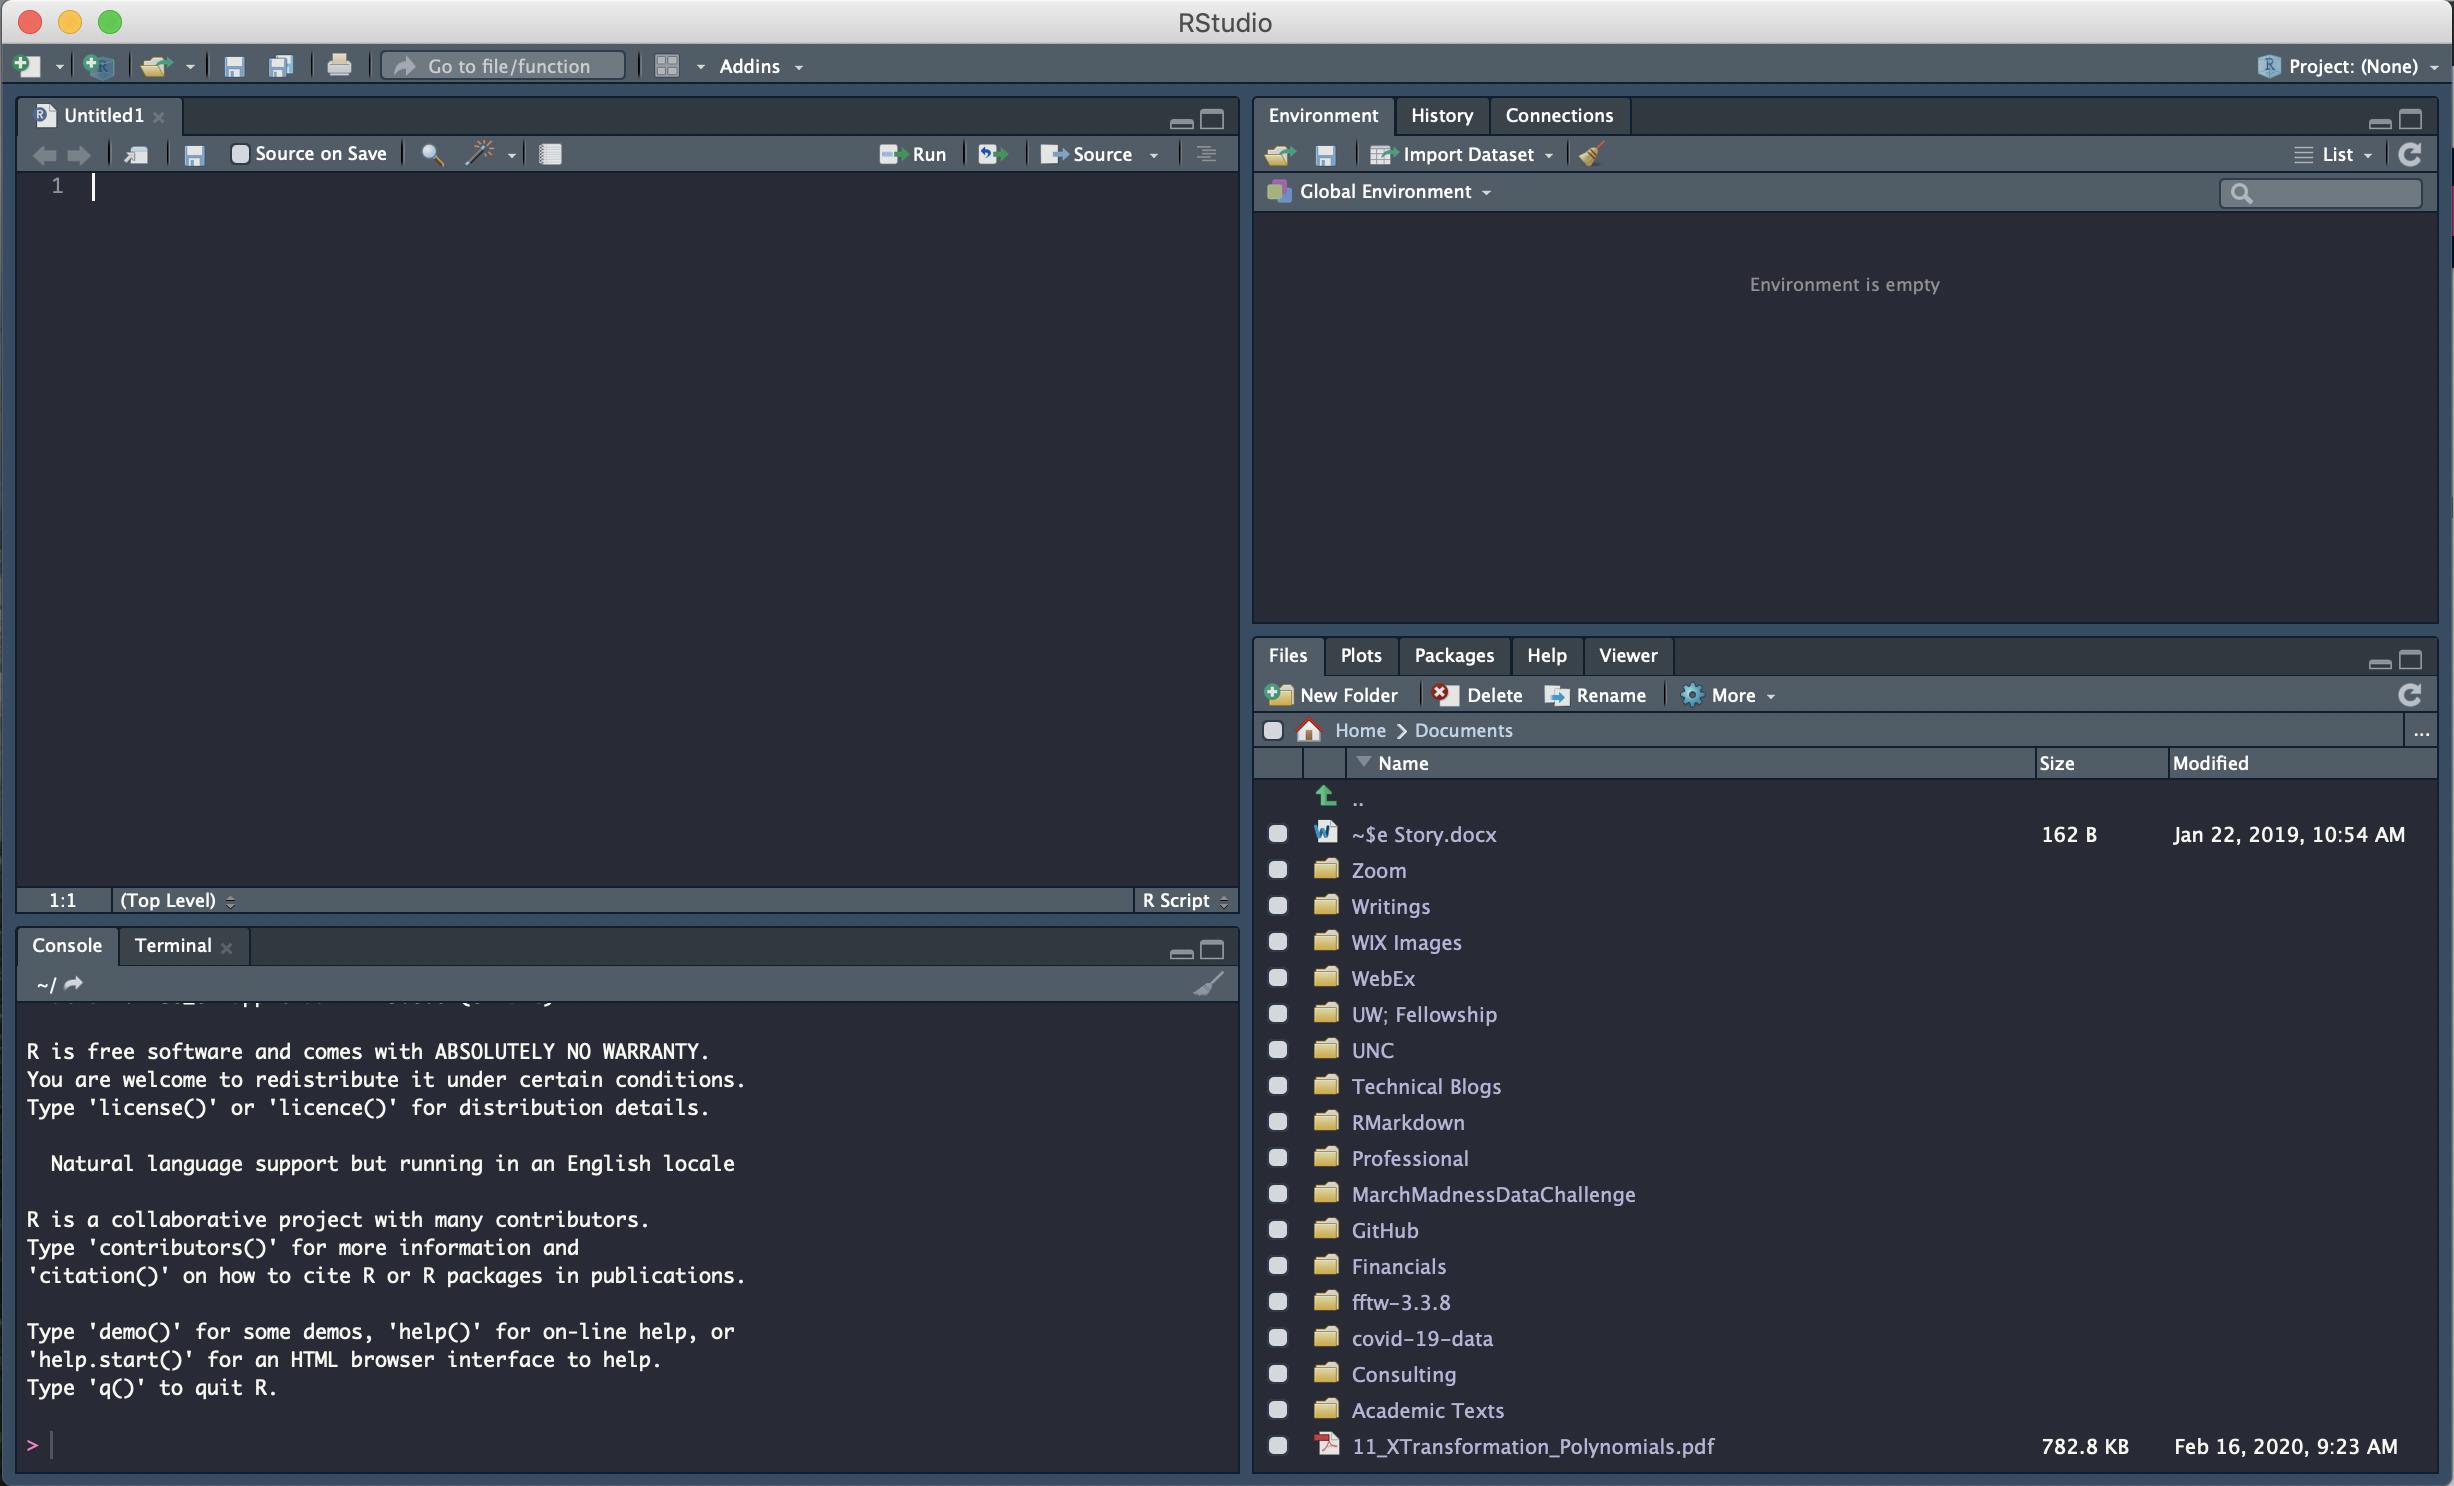
Finally, we should discuss how to actually open and begin a script. Find the white square icon at the very upper left of RStudio (the one with a green plus sign). It is a dropdown menu - select R script.
You should now have a pane that looks something like this:

Opening a script
You can work in the console if you prefer, but working in a script allows you to keep track of what has been done to your data and what your process has been. Try typing 2 + 2 somewhere in the script, highlight, and press Run (on the top right of the script ribbon). See that 2+2 gets sent to, and executed in the console, but we still have a record of what has been done in our script.
You'll want to open a new script every time you're working on a new problem. Actually, best practices suggest that you begin a "new project". We will cover that at the end.
Finally, we will briefly cover loading in data.
Directories and Reading in Data
R is really great at handling different types of data formats, which includes .csv, SAS, etc. Most commonly, we are going to be working with .csv files. So, I'm only going to cover that here. Google is your friend when you run into any oddities regarding files you need to access with R.
Setting a Working Directory
To access data in R, you'll need to set a "working directory". A working directory tells R where you want it to look for data that you're referencing. R will not be able to read in data that it cannot find. Don't worry if this part seems confusing - we will cover it again.
To see what directory you're in, type getwd() into your console. This will tell you where you are within your computer's files. To set a new directory - you should set this where your data is - you can type setwd() into the console and deliver the path to that folder to it. This looks something like setwd("path/to/myFolder"). Let me show you an example.
Create a folder on your desktop labeled RFiles and save it there (you don't need to do this part with R). Once you've done that, you can type setwd("~/Desktop/RFiles"). The tilde tells R go all the way to Desktop, then select the RFiles folder. Now type getwd() into your console. It should read something like: "/Users/btbeal/Desktop/RFiles". Now, if you place data in that folder, R can find it. So, let's do that.
Let's download this .csv file by clicking this link. Store the data as "gapminder.csv" in your new folder, RFiles. Now, we can discuss how to read it in.
Reading Data
As mentioned, data is most commonly in a .csv file. To read it in, we can use the read.csv2() function and store it in our environment by typing the following into our script that we have opened: new_data <- read.csv2("gapminder.csv").
If all goes to plan, you now have a data set loaded into your environment labeled "new_data". Don't worry about the functions we used to get there - we will cover that in class.
Using Projects
Projects make life easier and help make your code more reproducible. Notably, if you're setting a directory manually like we've done above, your code will not run on someone else's machine... unless they've the same file path as you (unlikely). When you are working within a projects folder, you can simply send a project over, with all the files, and use "relative" paths therein to make your code translatable.
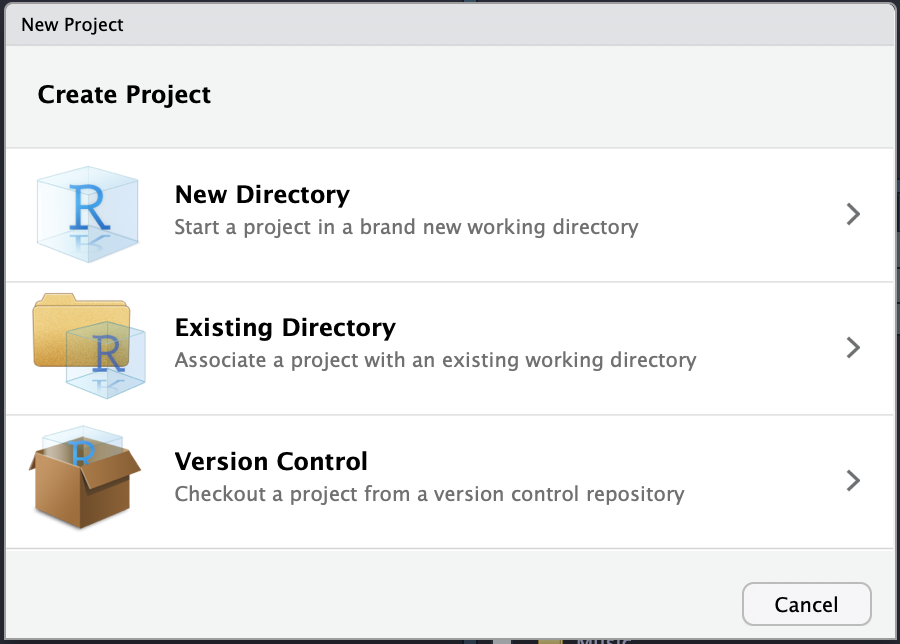
In RStudio, to the right of our script button in the upper left, we can see a blue box with another green arrow. Click that. There you will see a few options:

Choosing project directory
Since we already have a new folder, let's associate this project with that folder. Click "Existing Directory" and "browse" to find that folder.
Now, we can read in data just like we did above. Further, we can send that folder (with the project) to someone, who could save it wherever on their machine, and run your code. This is considered best practice for writing reproducible code.
Now, getting started in R is probably the most difficult part. And learning a new language takes time. But, once you're up and running after week one, I think you're going to see that R is an awesome, fun, language that is going to help you a lot in the future. After all... this whole website was built from within R!